The Class Couple
  • HOME
  • About Us
  • Blog
  • Read
  • Our Home
  • Shop

Project Based Learning: Planning

8/2/2015

0 Comments

 
Picture
I like projects. The next step is getting my learners to like "a project". Over the past few years, I've found success in building big idea projects and allowing learners to take control. Since the Spring of 2014, we've held a film festival, community awards ceremony, and a music showcase. Colleagues have asked, "How do you plan such a big project?" or "Aren't you running out of ideas?". Preparing for these projects doesn't happen over night. And if you're like me, many of my best ideas come at the most random times. So, I thought I'd share how I keep my project planning organized.
You first need to ask, what do you want your final product to look like? For our most recent project, I had always wanted my learners to hold a concert. The only problem - I teach social studies, not music. A lot of questions arose - 1. How do I get a bright group of social studies students to "do music"? 2. How can I tie this project to the standards? 3. How do I make it about the ideas and not the music? I needed to sort out my ideas to determine the big connectors and direction of the project.
Picture
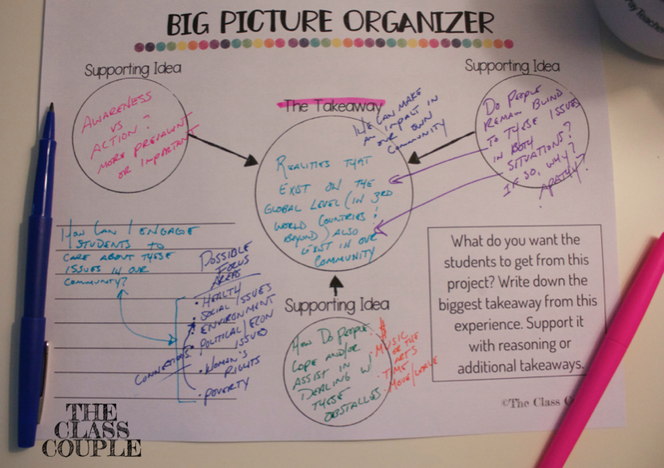
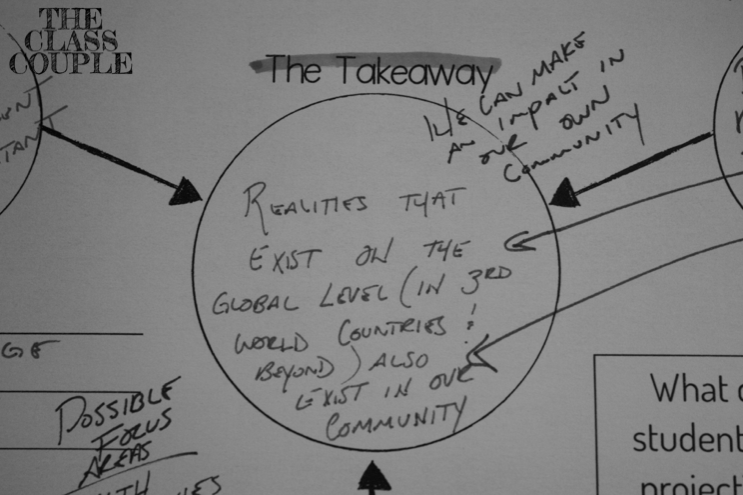
Once I figured out that I wanted to make the project more about the community and its relevance to greater world issues, things fell in place.
Picture
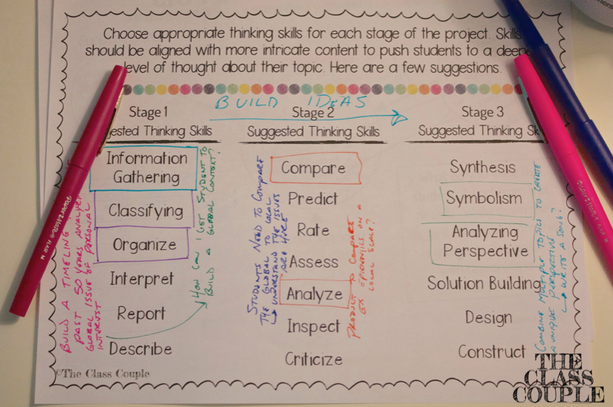
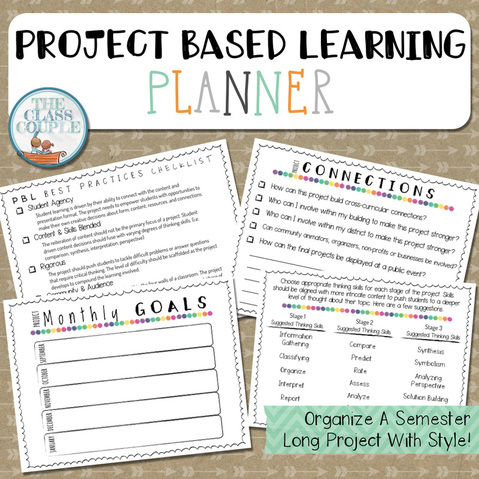
I like to build my projects in to three stages. (Quick side note: The entire project, from stage one through the end of stage three, takes approximately 14 weeks.) Each stage is independent in its final product, but the learning/knowledge base builds from stage to stage (to stage). Not only does the information build, the depth of thinking also increases within each stage. That doesn't necessarily mean more content, it just means that I'm asking the learners to engage with their information more closely.
Picture
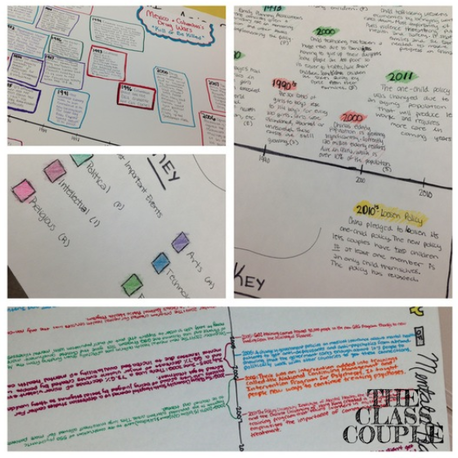
For Stage 1 of our Spring project, my students completed a timeline that analyzed a global issue that matched their interest. They researched the past 50 years of the issue to build a contextual understanding of the topic.
Picture
Throughout the 14 weeks, students intermittently work on the project. Here's the thing - I recognize that I am not an expert in every topic. I encourage students to seek help outside the classroom. The second stage "strongly encourages" students to gain assistance from professionals - nationally or in the community. 
Picture
At first, students are unsure about this component. But they've gotten some pretty amazing results. Some of my students most notable connections were a professor from Columbia, a prominent expert on Olympic history, and a well-respected surfing historian. AND all it took was a simple e-mail! (There were students who also never heard back from someone they attempted to contact. We had some candid discussions about that - and they were okay!)
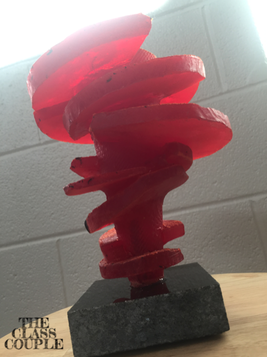
These connections don't have to be as grand - they can happen within your building or district. Find people that might be willing to buddy up on a project. The art department at my high school is fabulous and usually willing to team up with enough advance notice. For our project last Fall, one of our art teachers worked with my students on the development of an award and the symbolism involved in the process. This was their final product:
Picture

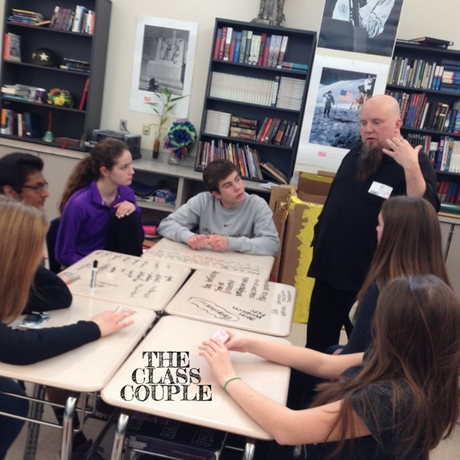
And with my assistance, Stage 3 usually has students directly working with local professionals. These connections are built in to the process. For the Spring project, my students worked with local musicians to write songs about global issues. This picture is from an early collaboration session. 
Picture
Honestly, there is a lot that goes in to a great project. My students and I have pulled off things that I never imagined were possible. It took a lot of planning, time, and leg-work to pull off these ideas. 
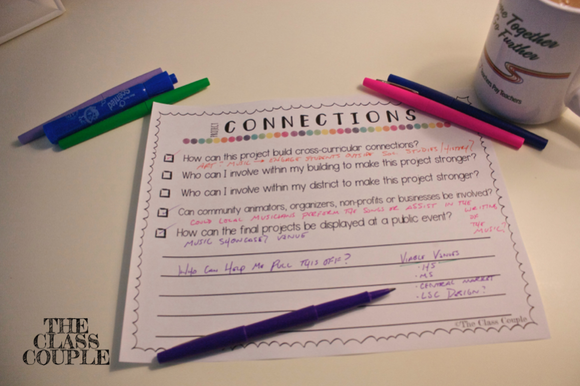
Here's the thing - YOU CAN DO IT! I put together a planner with questions and organizers to help you with the process. Many of the questions are ones that have crossed my mind countless times! Best of luck planning your own project and please let me know if you have any questions!
Picture
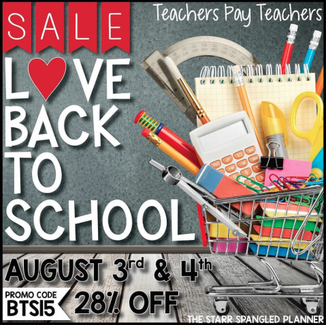
By the way --- Our entire store is on sale tomorrow and Tuesday! Please be sure to check out the planner and all our other products that are on sale!
Picture
Picture
Follow
0 Comments

ADD A GIF TO YOUR TPT PERSONAL QUOTE

7/25/2015

7 Comments

 
Picture
So, how do you pronounce GIF? Is it GIF with a hard G or "JIF" like the peanut butter brand? Actually, it's the latter. Earlier this summer, Becky showed me a few TPT stores that replaced their personal quotes with PNG/JPG files with a GIF. After finding a few tutorials, I decided I could tackle the job! 
This is my final product: 
qcjzdsa
I'm super excited that I handled everything - from Photoshop to the HTML code. It wasn't easy, but here are a few things I learned from my project.

1. CHOOSING YOUR APPLICATION

Becky and I had a long discussion about what to highlight in our GIF. Obviously, each store owner can choose several things that you want to reinforce to your customers. Selecting two or three products with general comments for several slides will build a concise snapshot of what your store has to offer. 

There are a lot of applications that can handle this type of process - PowerPoint, Keynote, or Photoshop, to name a few. I created the images (450 pixels x 150 pixels) in Keynote and then exported them to Photoshop. (I created it in Keynote because I have the experience and liberty to be more free with my design). 

2. BACKGROUND COLOR

Here are a few notes about the image creation:
1. You need the background of the image to match that grayish color on TPT. You can do that  by either making the background image in Keynote or PowerPoint that hue of gray OR you can extract the background in Photoshop when you put it together. The html code for that gray is #F2F2F2. If you're ever trying to match color or find the HTML code for a specific color, this is a great color wheel. 
Picture
Unfortunately, I couldn't choose a color based on the HTML code in Keynote. SO, you can save the image above OR take a screenshot of the personal quote from your TPT store. Throw the image/screenshot in to PPT or Keynote and do a color match. 
Picture
1. Click on the magnifying glass to the left of the horizontal box in the color tab. A magnifying glass will appear.
2. Select/Click the gray area on the image/screenshot you imported. The color will now appear in the horizontal box.
3. Go to your “design box” that you’re using to build your images and drag it to fill 

that box. 
And then there is always Photoshop. You can extract the background color. This is the best option, but not everyone has Photoshop.

3. BUILDING the GIF

I have an older version of Photoshop (CS3). There are plenty of video tutorials available for creating a GIF, but this is the best one that I found for my version. (If you're searching for other tutorials, just make sure you know the "instructor" is speaking about your version of Photoshop.)
If you want to create a GIF for your store, but don't have Photoshop - no worries. Here's an alternative - 
gifmaker.me. Here's a quick tutorial. 
Picture
1. Upload Images
2. Se the pixel size o match the size of the images you  created (450px x 150px is suggested)
3. Set the  animation speed.  1000 milliseconds equals 1 second.
4. Set the repeat  times to 0.
5. (Not Pictured) Scroll down and  on the right side click  “Download this GIF”.

4. PHOTOBUCKET & HTML CODE

Photobucket is the easiest way to upload your GIF to the web and get a source code. They offer a wide variety of links for different reasons, but the "DIRECT" link is the one you'll need for this job.
Picture
Once you copy the link to your GIF, you'll need to jump over to TinyURL.com. There are two links you're going to need to shorten:
  1. You're going to need to shorten the PhotoBucket Direct link you just created. Copy the link and throw it in a note or side document for just a minute (be sure to label it so you don't get the links mixed up). WE WILL CALL THIS LINK: "HTTP://TINYURL.COM/GIFLINK".
  2. You need to decide what you want the GIF to link to. We have ours set back to the blog, but you may want it to link to a specific part of your store or even a product. Grab that original URL and put that in to TinyURL as well. Grab the shortened link and put it in the same document as #1. WE WILL CALL THIS LINK: "HTTP://TINYURL.COM/SITELINK".
Now that you have both links, you're going to need to do some coding. Here you go:
<a href="http://tinyurl.com/SITELINK"><img src="http://tinyurl.com/GIFLINK" alt="GIFLINK"/></a>
If you want to test the code to make sure it works, you need to do the Tryit Editor! Feel free to play around with our GIF code:
<a href="http://theclasscouple.com"><img src="http://tinyurl.com/qcjzdsa" alt="qcjzdsa"/></a>
Picture

5. COPY, PASTE, & ENJOY

Once you played around with the code and it's ready to go, simply copy and paste it in to your "personal quote" under your profile in TPT. Best of luck and if you need any help, just let me know!

Best,
Picture
Follow on Bloglovin
7 Comments

Instagram Confessionals! Part 1

7/12/2015

3 Comments

 
Picture
Greg here. I know that my better-half loves Instagram. For Becky, it's a quick way to share updates about classroom and personal life, as well as to see what is going on in the lives of all the other #teachersofinstagram. 
I was recently doing some research on Instagram desktop schedulers and stumbled upon a new site: Wisel.it! A young start-up out of Venezuela, Wisel.it seems to be the real deal! 
Picture
I thought I'd quickly share how I used Wisel.It the first time and explain some of it's features. You can create your own login via Wisel.It, but I opted to sign-in with Instagram to streamline my accounts. 
Picture
Once you link your account to Wisel.It, the process is rather simply. Simply click "Schedule New Post" to get started.
Picture
Most of you do editing in Instagram, VSCOcam, A Beautiful Mess, or other apps that conveniently do a great job. You can still make those edits using those apps, however, you'll need to e-mail the final image to yourself to upload via desktop since Wisel.It is a desktop based tool (for now anyway!). A slight inconvenience, but well worth the benefit. 
Picture
Once your image is uploaded, you simply frame the sliding box around the portion of the image you want to appear. If you shoot the image in square before exporting it to your desktop, simply select the entire image. They have several filters, and a flip option, but I suggest doing all of your edits prior to the
upload to Wisel.
Picture
One of the cool things about this site is that you can sign in to multiple accounts (3 total). When you select the account and caption it (just like you would on your mobile device), you'll see a convenient preview on the right. Select the date and time you want to post and you're set!
Picture
Once scheduled, you will receive a notification in Instagram asking for verification because your account is being accessed elsewhere (our notification came from Finland). I was a bit skeptical at this point, but I trusted the system! It worked without flaw - it posted at the time scheduled!

If you would like to read more about Wisel.It, you can check out this blog post, which what led me to this new scheduler. So, how might this help you manage your Instagram account? Let me know what you think!
Picture
3 Comments
<<Previous
    Picture
    Picture

    Mr. & Mrs.

    We are Becky and Greg from York, PA. Becky just started her 13th year of teaching first grade. Greg is a high school social studies teacher. We love teaching and this blog is a peek into our world. 

    Picture
    Picture
    Picture
    Picture
    Picture
    Picture
    Picture
    GoNoodle Inspiration Blog
    Picture

    the library

    June 2019
    March 2019
    August 2018
    February 2018
    September 2017
    August 2017
    January 2017
    October 2016
    July 2016
    May 2016
    April 2016
    February 2016
    January 2016
    November 2015
    October 2015
    September 2015
    August 2015
    July 2015
    June 2015
    May 2015
    April 2015
    March 2015
    February 2015
    January 2015
    December 2014
    November 2014
    October 2014
    September 2014
    August 2014
    July 2014

    Picture

    tag, you're it!

    All
    Adding
    Alphabet
    Apush
    Assessments
    Authentic
    Becky
    Becky & Greg
    Cause & Effect
    Children's Literature
    Classroom
    Classroom Community
    Classroom Management
    Classroom Tour
    Columbus
    Craftivity
    Criticalthinking
    Currently
    Doubles Facts
    Fact Families
    Fire Safety
    Five For Friday
    George Washington
    GoNoodle
    Graphing
    Greater Than And Less Than
    Greg
    Halloween
    Highfrequencywords
    How To
    Instagram
    Journeys
    Makingconnections
    Math
    Movie Making
    Numbers
    Perspective
    Phonics
    Primary Sources
    Project Based Learning
    Pumpkins
    Purpose
    QR Codes
    Raise Responsibility
    Reading
    Scholastic Book Orders
    Spelling
    Summer
    Summer Prep
    Teachers Pay Teachers
    Technology
    Time
    Twitter
    Videos
    Writing

    Picture

    subscribe

    Enter your email address:

    Delivered by FeedBurner


    Blog Design by Alexis Sanchez ©
Powered by Create your own unique website with customizable templates.