The Class Couple
  • HOME
  • About Us
  • Blog
  • Read
  • Our Home
  • Shop

Doubles Ladybugs

9/21/2015

0 Comments

 
Picture
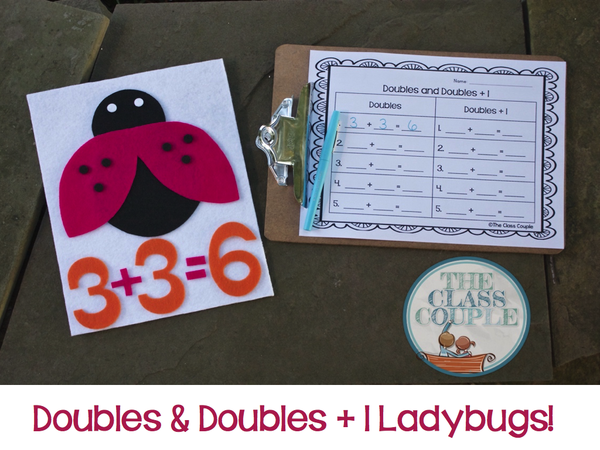
Hi everyone! I'm excited to be a part of the Kunin Group Felt Project Blog Party! I recently received a large box of awesome felt and other goodies from the very creative Laura Kelly, and immediately began thinking about what I could make for my math centers. When it comes to math facts, my students do well with doubles facts, but sometimes forget that they can relate them to the doubles + 1 facts. So I made some doubles ladybugs to help my students practice the relationship between doubles and doubles + 1 addition fats. 

I thought I'd share with you the steps I took to make the ladybugs! The felt I used was 9" x 12" Craft Cuts Kunin Eco-fi Classicfelt™. You could also use cut by the yard Kunin Eco-fiPlus™ Premiumfelt.

*Disclosure: Some of these products were samples provided to me to try. Opinions and the choice to use  are 100% my own! This post contains product links.*

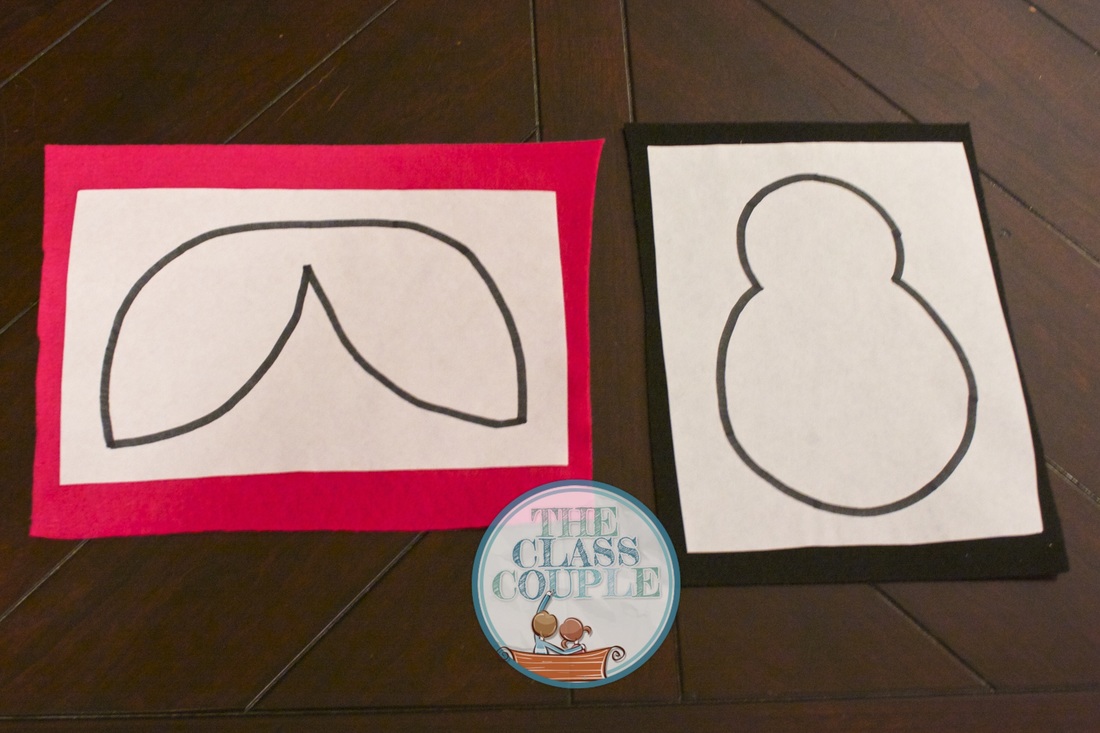
After researching the easiest and most time saving methods for cutting felt, these were the steps I followed. I first drew the ladybugs patterns onto paper, and then placed them underneath freezer paper, tracing them onto the freezer paper. You can find the patterns for the ladybug here!
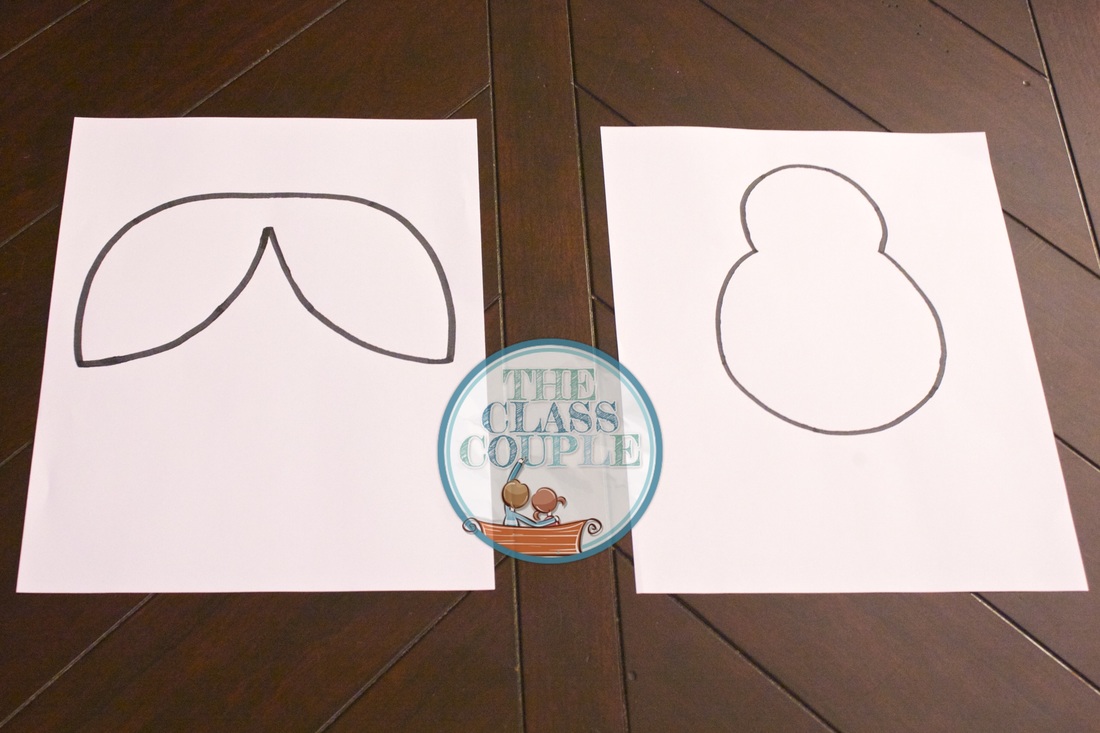
Picture
Ladybug Patterns
Picture
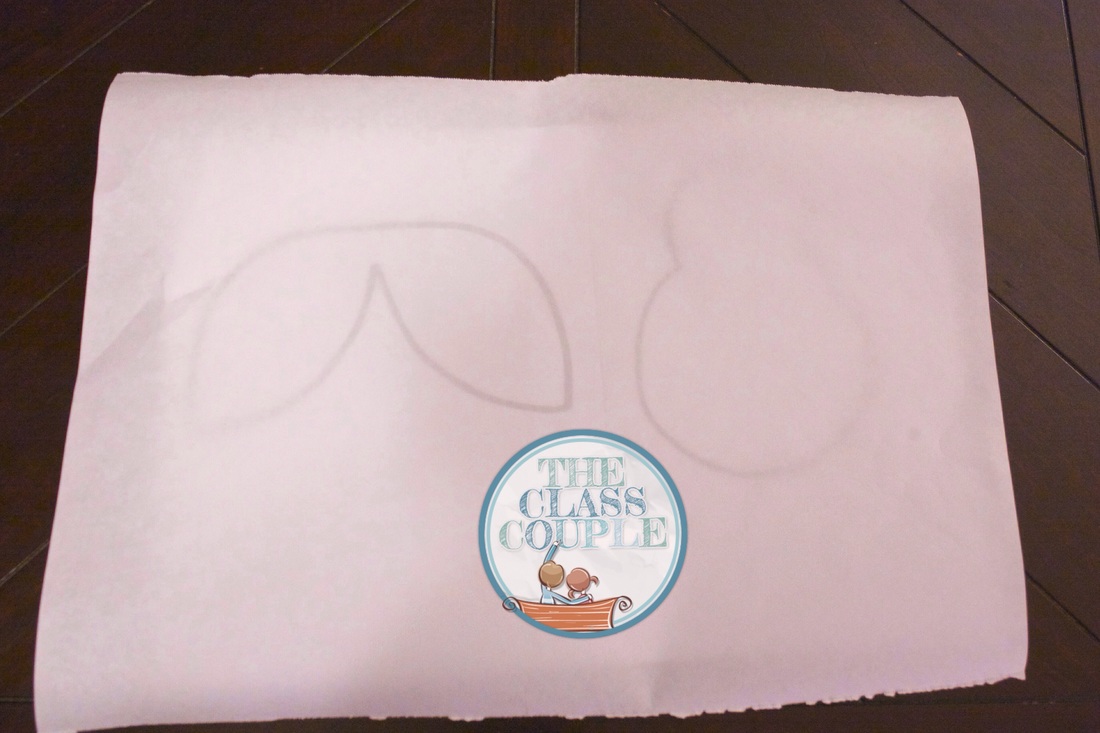
Freezer Paper Over Pattern
Picture
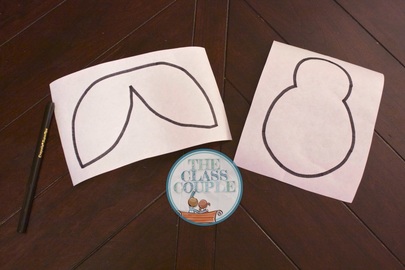
Pattern Traced onto Freezer Paper
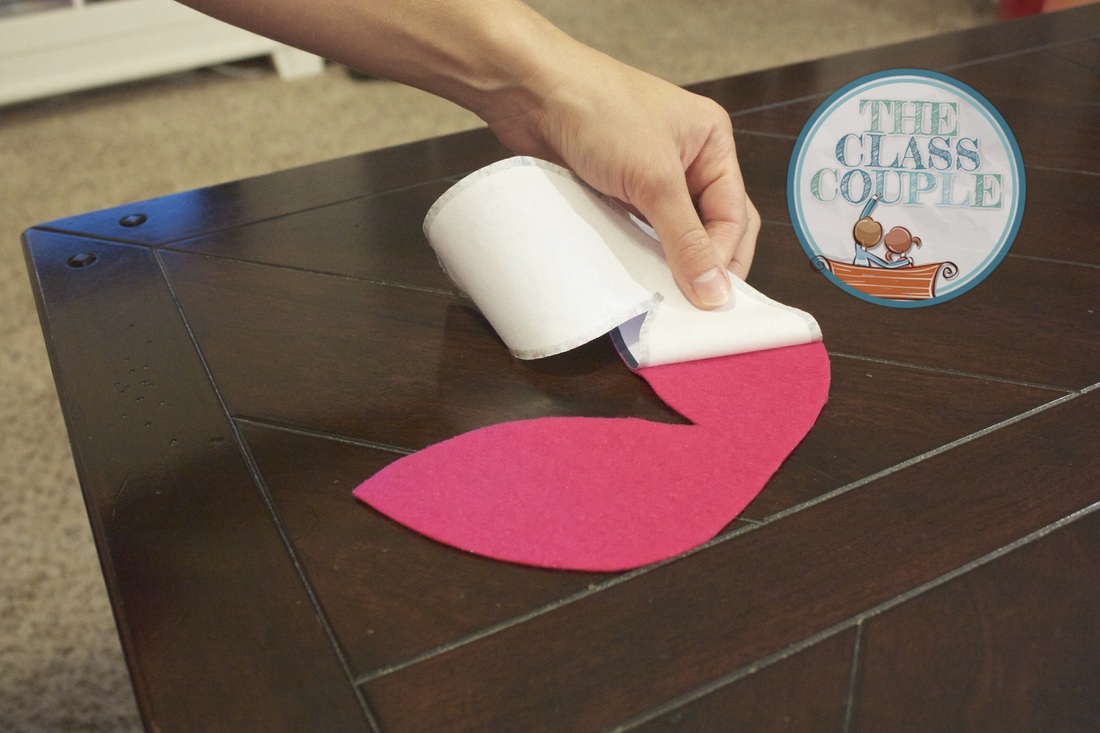
From there, I ironed the patterns onto the felt (shiny side touching the felt). This made it much easier to cut out the pieces, and I didn't have to fool around with trying to draw on the felt. The best part about this was that the freezer paper peeled right off, and I could iron it on to another piece to make more ladybugs!
Picture
Iron Freezer Paper onto Felt
Picture
Cut Felt Using Pattern
Picture
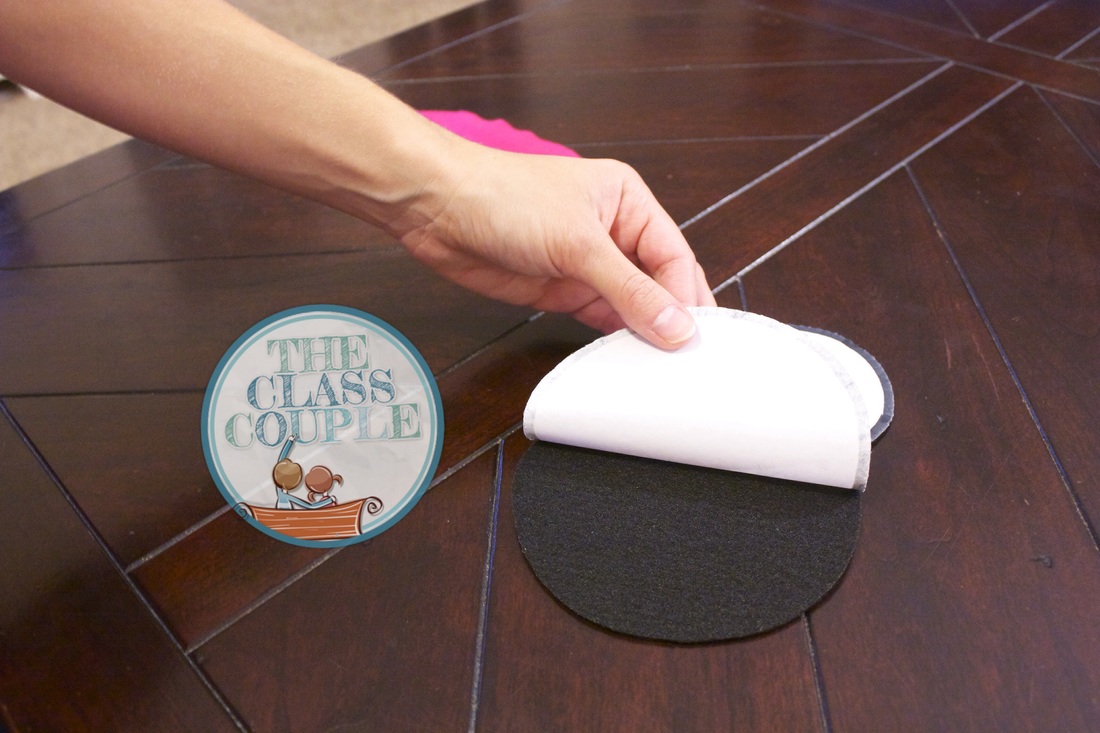
Peel off Freezer Paper
Picture
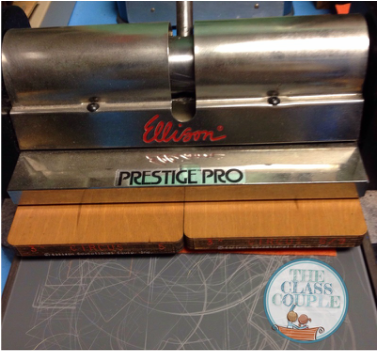
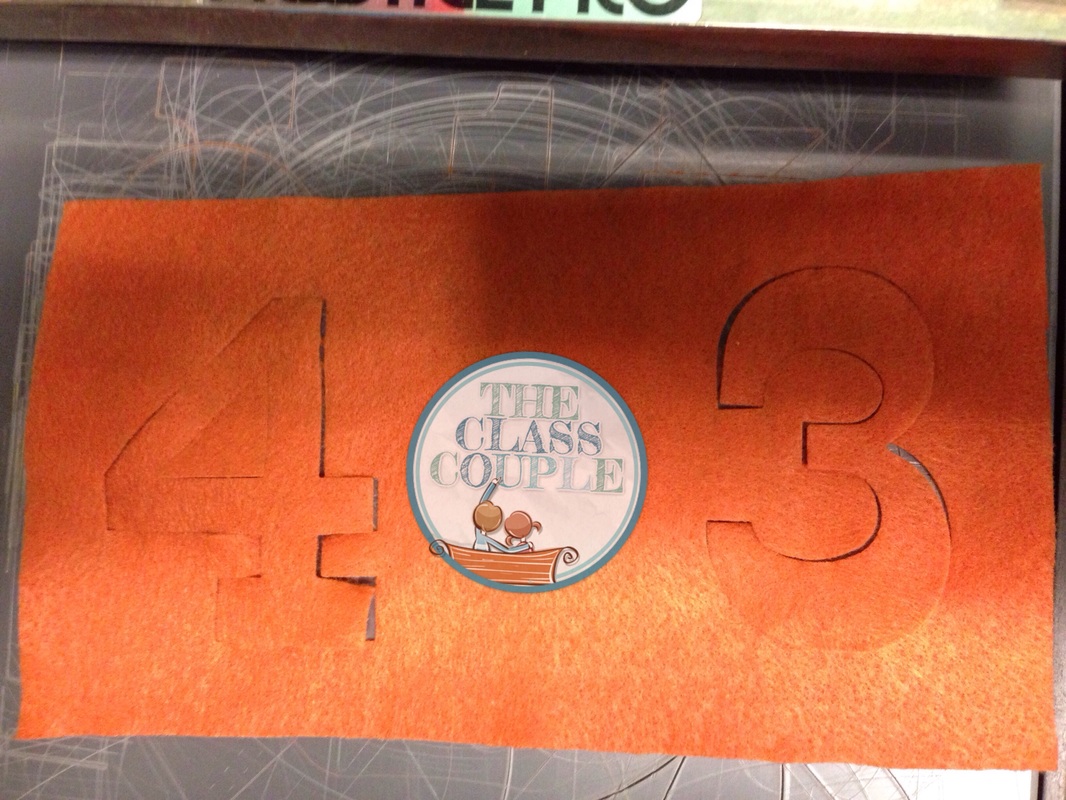
Once I had the main ladybug pieces cut out, I spent some time after school one day with our school's well loved Ellison Prestige Pro Die Cut Machine. I used our number die cuts, and while it didn't always fully cut through the felt for the whole number (due to the well loved condition), I only needed to go back and do a few snips to remove the numbers from the felt. I also used the "lowercase i" die cut to get the dot from the i for the ladybug dots! Such a time saver!
Picture
Picture
After cutting out a plus and equal sign, I also made a felt board with a piece of cardboard from the backing of a pack of paper. I used spray adhesive to glue the white felt onto the board. Then, my center was complete!
Picture
Materials Needed for the Doubles Ladybug Center

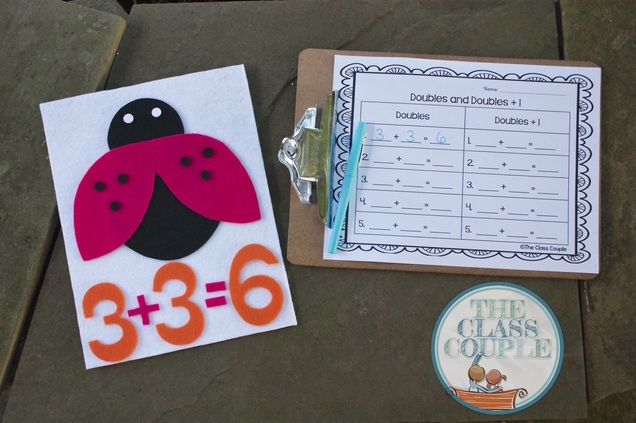
1. Have all felt pieces ready for students: ladybug body, wings, white dots for eyes and +1, black dots to go with the number sentence, numbers, plus and equal sign, and felt board. 
2. Print out the "Doubles and Doubles + 1" recording sheet (Click here to get the sheet!)
3, Have one or two dice in the center, depending on the range of facts you want to be practiced.

How to Play (Can be individual or partner play)

1. Have students place the ladybug body, wings, and eyes onto the board.
2. Students roll the die or dice. The number they roll is the number they show in doubles facts. Ex.
rolling a 3 would become 3+3. If they roll two dice, students add the numbers on the dice together
to find the number they double.
3. After rolling, students place that number of black dots on each ladybug wing. They also complete the number sentence with felt numbers, and record it on the recording sheet. Students may count the dots on the ladybug to help them complete the number sentence.
4. Students then add a white dot to one of the wings and change one addend in the number sentence, and then solve for the new addend. Record the doubles + 1 number sentence.
5. Clear numbers and dots from board, roll the die/dice again and complete the same steps.
Picture
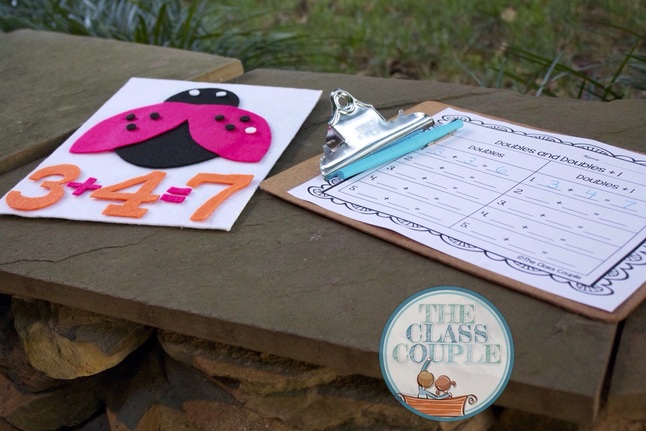
White dot added for doubles + 1
You can now find an expanded color line of Kunin Eco-fi Classicfelt™; Eco-fiPlus™ Premiumfelt and ShaggiChic  non-wovens fabrics in cut by the yard at your local Walmart. Please inquire as to what is available in your area. 

You also have a chance of winning the Ellison All Star Die Cut Machine and Kunin Felt Craft Stash by participating in the rafflecopter! This is such an amazing prize! Can you imagine how much time the die cut machine would save you?!
a Rafflecopter giveaway
Be sure to check out all of the other amazing #classroomswithfelt pojects from some of my blogging friends! These posts have inspired me to get my craft on!
An InLinkz Link-up
0 Comments

GoNoodle Blogger Blitz

9/5/2015

1 Comment

 
I'm really excited to be linking up with GoNoodle for their Back to School Blogger Blitz! If you're looking to spice up your GoNoodle game, this is the place for you! Tons of fabulous bloggers are sharing how they use GoNoodle in their own classrooms, so get your GoNoodlin' shoes on and be sure to check it out!
Picture
I start out the year by explaining to my students that while GoNoodle is a lot of fun, we also do it to wake up our brains before learning. Over the summer, I took a grad class about movement in the classroom, and while I have always loved GoNoodle, I learned how truly valuable it is for the brain development amidst our busy schedule and demands placed on ourselves and our students. You can read more about the importance of movement here.
Picture
As we all know, the classroom dynamic changes based on the students we have. I had a very high energy class last year, so they needed lots of high energy brain breaks from KooKoo Kangaroo to Run Like the Kitty! This year, however, my students are a little more laid back and have also enjoyed some of the calming brain breaks. I need to be more mindful of this when making the selections. This group is really enjoying Maximo's yoga, so I am going to try and introduce more of these exercises to them.
Picture
Picture
I also love how GoNoodle is an instant incentive for my kids. They love it so much and never want to miss an opportunity to participate in the brain break! This has come in really handy at the beginning of the year. Since we're only 8 days into our school year, we are still using the bathroom together as a group. However, they know that after the bathroom break we do a GoNoodle. Because of this, they are spending less time in the bathroom, and we are getting through the line a lot faster! Additionally, I love using it as a surprise for good behavior! If my kiddos are doing exceptionally well, or one of my friends is having a really good day, we will celebrate with a GoNoodle brain break of their choice!

I also love incorporating GoNoodle into our regular learning of the content standards. You read two posts regarding how I do that here and here!
Picture
Picture
As part of the GoNoodle Blogger Blitz, every blogger is giving away a piece of GoNoodle swag! You can win this Canvas Champ Tote bag by entering the Rafflecopter below!
Picture
a Rafflecopter giveaway
To make this blitz even better, GoNoodle is offering 15% off everything in the GoNoodle store, with the code BTSwithGoNoodle now through September 11! With all of the cute items in their store, I will definitely be ordering some new swag! Also, be sure to check out all of the other bloggers participating in this link up to read their ideas, and to also participate in their giveaways for a chance to win even more GoNoodle goodies!

Enjoy your weekend, and happy GoNoodling!
Picture
Follow
1 Comment

2015 Classroom Reveal

9/2/2015

3 Comments

 
Picture
I am so excited to be joining in with Blog Hoppin's Teacher Week and the fabulous Ashley Schroeder and Angie Olson for their second #2getherwearebetter link up! Today we are all sharing our classroom reveals! I have to start out by telling you that in the past, when I have set up my classroom, I never really thought about everything matching and complimenting each other. I just bought stuff that I liked, put it in my room, and that was that! It didn't always go together, and seemed a bit like a hodge-podge, but it was OK. So, this year, thanks to Instagram and Pinterest, I was inspired by all of the amazing pictures of everyone else's classrooms, and made an effort to try to coordinate colors. I have to tell you that I am LOVING the finished product, and finally feel like my room is complete! So, without further ado, let's get this tour started!
Picture
Picture
Picture
Before coming into my room, you will find my hallway display. This has become one of my favorite parts of Back to School! I love coming up with a new display to welcome my first graders each year. I had been talking about ideas with Greg earlier this summer, when Jurassic Park was in theaters, and he suggested the Jurassic Park/dinosaur theme. I made a quick sketch, and instantly knew this would be it! I love the way it turned out, and think it's my favorite hallway display to date! 
Picture
After the hallway, you see my little pal on the door welcoming my kiddos and anyone else entering my room. The super talented Lauren from Polka Dots and Pals designed my pal to look like me, right down to my favorite winter outfit! Some of my first graders have noticed that it looks like me! I'm sure the rest will once it gets cooler and I wear said outfit! 
Picture
This is probably my favorite view from my classroom! I took away curtains that kept a lot of light out at the top of my windows, and made this fabric garland curtain that I absolutely LOVE! It lets in so much more light, and it really highlights the colors in the fabric. It really makes our reading area bright and inviting. My kids have commented about it a lot too! WARNING! If you plan on making one, and have a 10 foot window, be ready to tie LOTS of knots! It was well worth it though! TIP: Tear your fabric instead of cutting it. It will save your back!
Picture
I made this ribbon chandelier last year, and it was one of the few things that I kept. I'd say it was the beginning of my tied ribbon/fabric obsession!
Picture
This cute little cart is from IKEA! I knew I needed some way to organize my materials and keep my table from becoming a train wreck after a day full of reading and math groups. I'm hoping this will do the trick!
Picture
Picture
I also covered my bookshelves with drawer liner and washi tape! I covered the "Caption This" shelf last year, and we printed out some of the pictures I took of my kids, and they wrote captions to go along with them. I just scored the other bookshelf I covered in the gray chevron a week ago, so I'm not quite sure what the plan is for this one...yet!
Picture
This is our calendar/word wall/whole group learning area. We spend a lot of time together in this area, and the students know that they can come to this area to look up words, look at books, and to sit together to work in small groups. The top bulletin board goes along with my classroom management plan that you can read about here, and hear about here!
Picture
Picture
I do appreciate all of the shelving and cabinets in my classroom. In an effort to keep my shelves organized, and help me remember where I put things, I labeled my shelves so I can easily find the papers I need. It is also helpful for substitutes when I forget to pull things out and need to tell them where they can find the materials! 
Picture
Take a good look at this clean desk! I will be honest and tell you that now that school has started, it definitely does not look this nice now! Last year I got rid of my big teacher desk to make room for more learning areas for my kids. I still needed a desk to hold all of my stuff, so I found this one on Craigslist for an amazing price! I never sit at it, but it's just nice to have a place to put the random things I get from my kids or in my mailbox throughout the day when I don't really have the time to put them where they need to go.
Picture
Picture
My second big purchase for my classroom this year was the IKEA Trofast Storage shelves. I'm really excited to use these to keep all of my centers in one spot, and have them easily accessible for my kiddos!
Picture
I will leave you with a shot of the room the day before school started and the fun began! If you are still reading this, thanks for checking out my room! It was a labor of love, as it is for all teachers, but it is worth it to create a welcoming, safe environment where my students will learn and grow! Be sure to check out all of the hard work my fellow teacher bloggers have put into creating some amazing learning spaces for their students!
Picture
Picture
Follow
3 Comments
    Picture
    Picture

    Mr. & Mrs.

    We are Becky and Greg from York, PA. Becky just started her 13th year of teaching first grade. Greg is a high school social studies teacher. We love teaching and this blog is a peek into our world. 

    Picture
    Picture
    Picture
    Picture
    Picture
    Picture
    Picture
    GoNoodle Inspiration Blog
    Picture

    the library

    June 2019
    March 2019
    August 2018
    February 2018
    September 2017
    August 2017
    January 2017
    October 2016
    July 2016
    May 2016
    April 2016
    February 2016
    January 2016
    November 2015
    October 2015
    September 2015
    August 2015
    July 2015
    June 2015
    May 2015
    April 2015
    March 2015
    February 2015
    January 2015
    December 2014
    November 2014
    October 2014
    September 2014
    August 2014
    July 2014

    Picture

    tag, you're it!

    All
    Adding
    Alphabet
    Apush
    Assessments
    Authentic
    Becky
    Becky & Greg
    Cause & Effect
    Children's Literature
    Classroom
    Classroom Community
    Classroom Management
    Classroom Tour
    Columbus
    Craftivity
    Criticalthinking
    Currently
    Doubles Facts
    Fact Families
    Fire Safety
    Five For Friday
    George Washington
    GoNoodle
    Graphing
    Greater Than And Less Than
    Greg
    Halloween
    Highfrequencywords
    How To
    Instagram
    Journeys
    Makingconnections
    Math
    Movie Making
    Numbers
    Perspective
    Phonics
    Primary Sources
    Project Based Learning
    Pumpkins
    Purpose
    QR Codes
    Raise Responsibility
    Reading
    Scholastic Book Orders
    Spelling
    Summer
    Summer Prep
    Teachers Pay Teachers
    Technology
    Time
    Twitter
    Videos
    Writing

    Picture

    subscribe

    Enter your email address:

    Delivered by FeedBurner


    Blog Design by Alexis Sanchez ©
Powered by Create your own unique website with customizable templates.