We all love blogging, but what about those times when you want to share that fabulous activity you did with you students, or your latest school supply steal, but don't have enough time to write a blog post? That's where Instagram (IG) comes to the rescue! As a mom of two busy little boys, I love how quick and easy IG is! I can post a picture of an activity, meme, outfit, etc, write a short description about it, and share it with all of my Instagram friends! It's fast, simple, and easy, so I can go back to doing whatever it is I need to do!
In this post, I'm going to show you some tips and tricks that may help you along the way, as well as some apps to add some pizzaz, and make your life easier! I find that the best way to explain a tech tool is through lots of pictures, so here we go!
In this post, I'm going to show you some tips and tricks that may help you along the way, as well as some apps to add some pizzaz, and make your life easier! I find that the best way to explain a tech tool is through lots of pictures, so here we go!
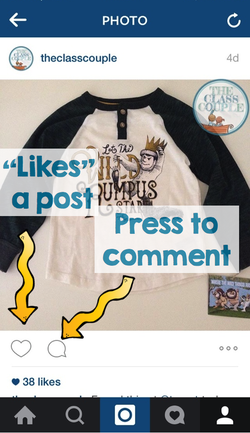
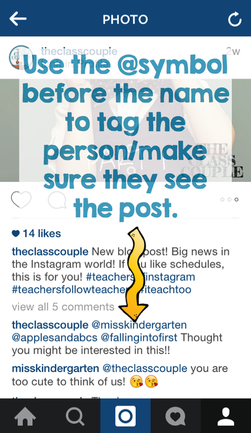
The Basics: If you just started you're IG journey, welcome aboard! To show some love for an Instagram post, all you need to do is press the heart. To leave a comment on a picture, click on the speech bubble and type away! Sometimes we see a post that we believe another IG friend would like to see. To share with the friend, simply type the @ symbol before their IG name, along with your message. This will tag them in the post, and show up in their notifications, alerting them to check out that particular post.
|
|
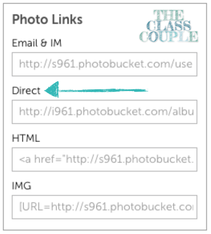
Sending a direct message: You can also send a photo and message directly to specific people, friends, or family members. This may be helpful if you want to share an image for a blog hop or when promoting a collaboration. You can find a nice tutorial for this here.
Let's Talk about Apps, Baby! There are many different apps to choose from when using Instagram, and they all have various purposes. Here are a few of my favorites!
Let's Talk about Apps, Baby! There are many different apps to choose from when using Instagram, and they all have various purposes. Here are a few of my favorites!
 A Beautiful Mess
A Beautiful Mess allows you to add fun star bursts, arrows, hearts, etc. on your photo to bring attention to certain aspects. I love that you can add text to your pictures! Lets face it, as someone scrolling through their Instagram feed, you are more likely to read the text in the photo before reading the description, so make it catchy! A Beautiful Mess also has backgrounds that you can use and add text. This is great if you have a question to ask without a picture! *This app does cost 99 cents, but it is well worth it in my opinion!
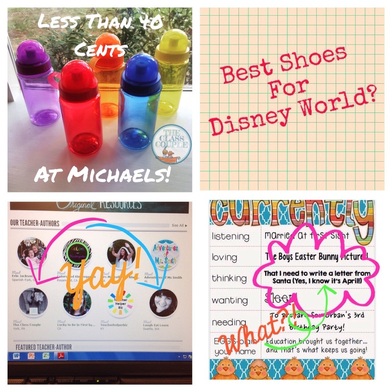
A Beautiful Mess Examples
 PhotoGrid
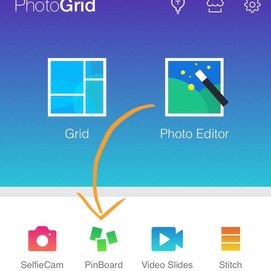
Photo grid is an app I like to use when participating in Instagram linkies that require you to put a photo on top of a background. This app offers a lot of options, but to place a photo on a background, make sure you have taken a screenshot of the background you will use, as well as the photo to place on top. You will choose the PinBoard option, which will then allow you to choose the images (background and photo(s)) that you want to use. You can then situate them images to suit your needs! *This is a free app!
|
PinBoard Example with PhotoGrid
|
 Repost
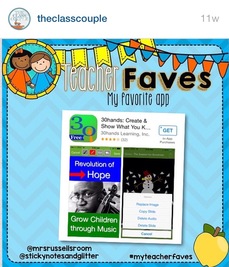
Sometimes you might like to repost a photo and description from another Instagram user. Many people do this to share ideas they loved, announcements, and giveaway. To give the original poster the appropriate credit, the Repost app is the best way to go! With this app, you can search the user and identify the post that you want to share with others. Once you have selected it, you click the Repost button, and it will connect you back to Instagram to repost the photo and description to your account. You also have the ability to add you own text to the description. *This app is free!
 Pic Stitch
There are many apps that allow you to do photo collages. You can do them through A Beautiful Mess and PhotoGrid, but I tend to like the look of the collages from Pic Stitch because there is a white boarder/divider between each of the pictures. Pic Stitch also gives you many different layout options. *This app is free!
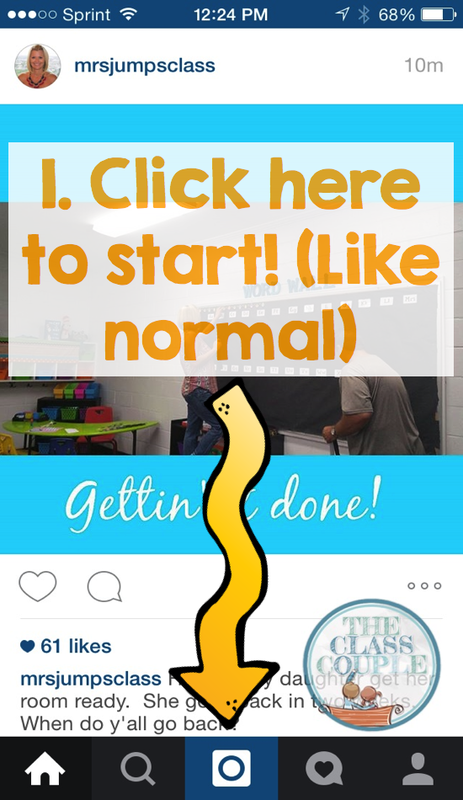
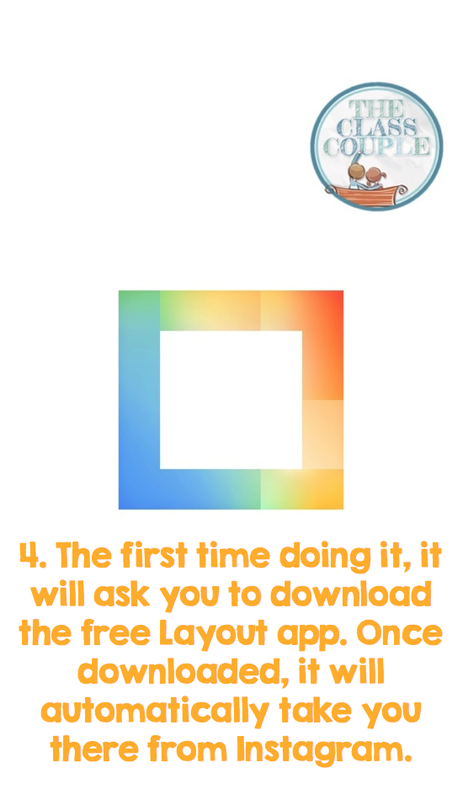
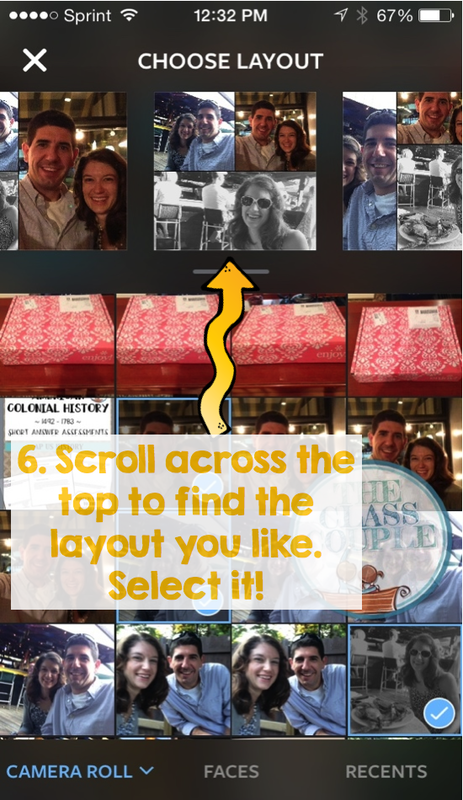
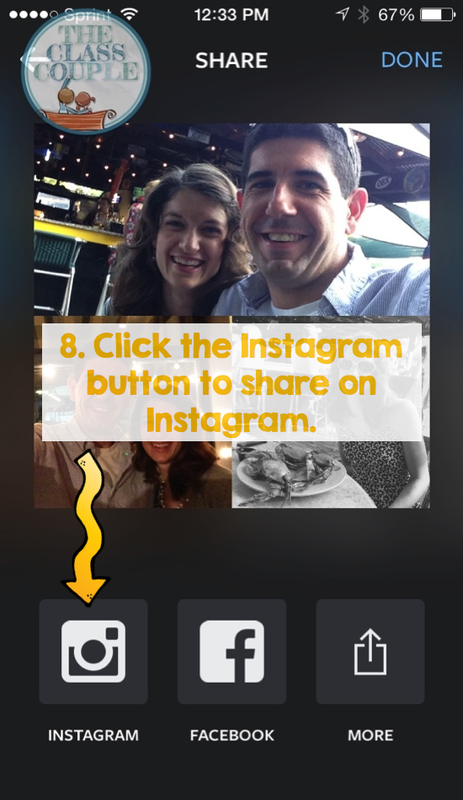
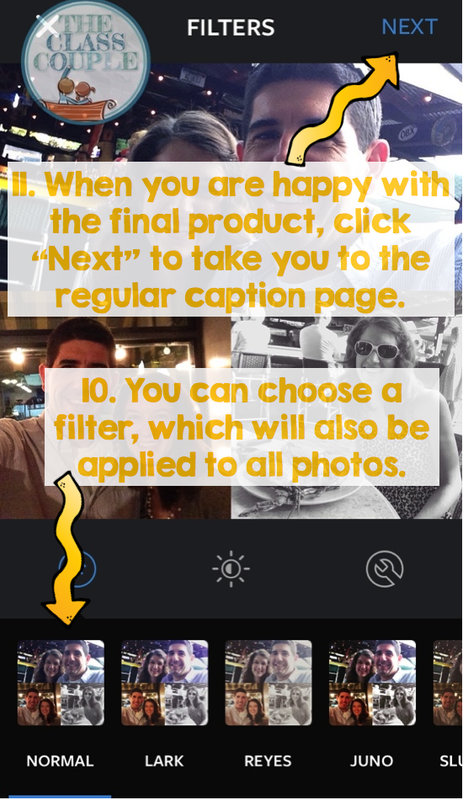
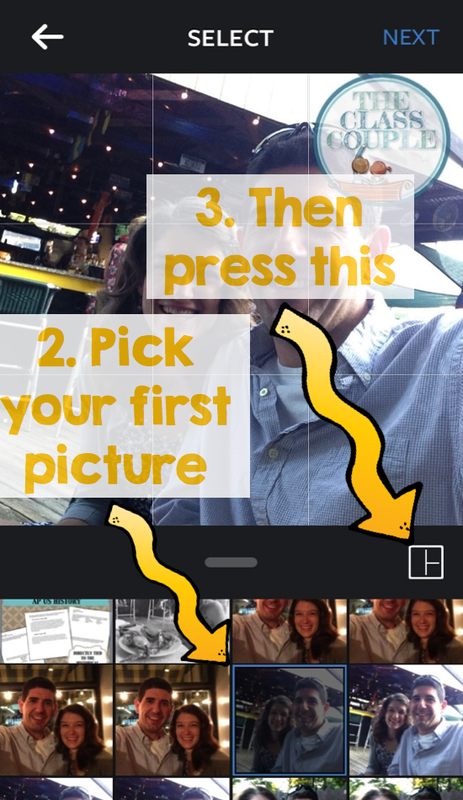
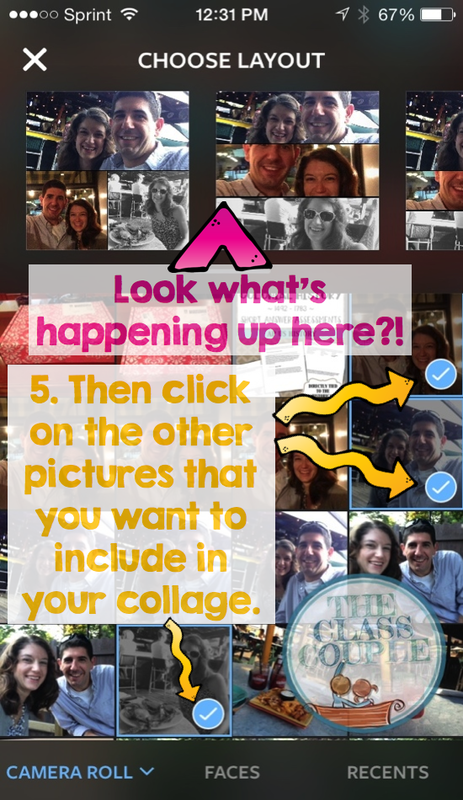
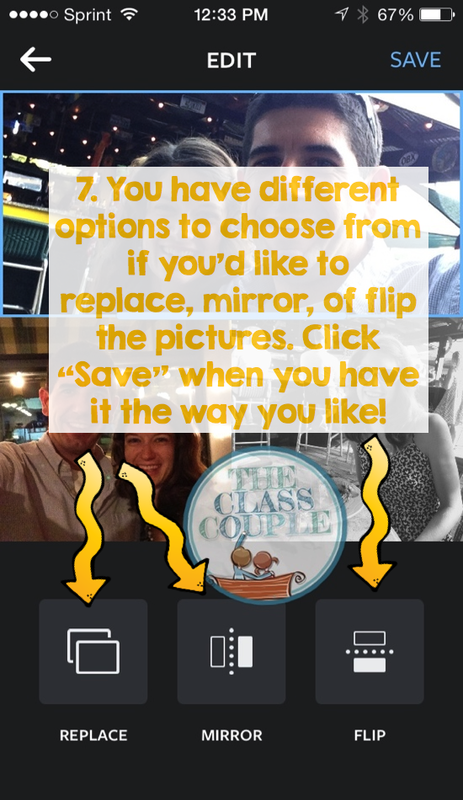
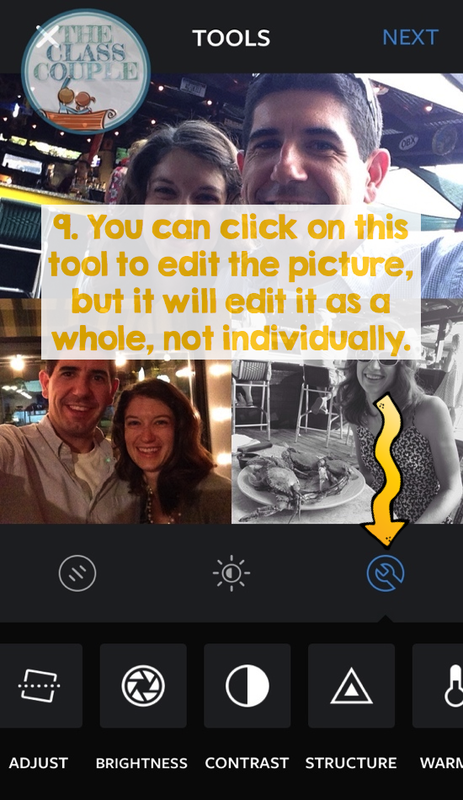
Keep it Simple! Did you know that there is also a free collage builder that is now built into your Instagram account? It is super easy, and I love how it gives you layout options with your pictures in the layout! You can read all about that here!
Collage in Pic Stitch. Notice the white borders.
|

Collage in Instagram (via Layout). No borders between pics.
|
Finding new people to follow There are many ways to find new people to follow! The first is to search a hashtag that interests you. For example, if you are a first grade teacher, you could search the hashtag #iteachfirst. Take a look at the pictures, click on one you like, and then check out the person you clicked on. If you like what you see, go ahead and become a follower! Some other hashtags you can search for followers are: #teachersfollowteachers. #iteach(grade level) #teachersofinstagram #teachersofig
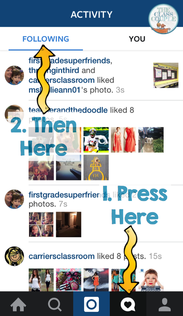
Another way to find new people to follow is by pressing the speech bubble with a heart at the bottom, and then "following" at the top. Here you will get to see the pictures that people you already follow have liked. You may see some pictures that catch your eye, and then check out the person they belong to!
Finally, don't forget about the followers you already have! You may have some who show you lots of love in likes or comments. Be sure to check out their IG page too!
What about getting new followers? When it comes to getting new followers, I find that engagement is key. While liking photos is great, commenting on photos shows interest in others, which may in turn, entice others to start following you!
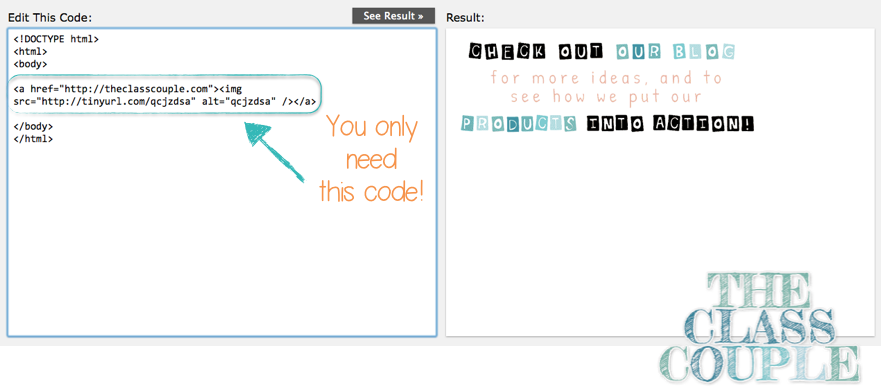
Flash Freebies & Giveaways Freebies and giveaways on Instagram are a great way to say thank you to your followers as well as celebrate different occasions, whether it be a blogiversary, a milestone, finishing a new product, etc. For a freebie, all you need to do is post an image about it, and place the link in your profile. When doing a giveaway, you need to decide if you are going to host it solely on IG, or advertise it there and host it on your blog or Facebook page. If hosting on Instagram, you set the parameters for the entries, whether it be for the participants to repost the image with a special hashtag, place a comment under the picture, etc. Speaking from experience, if you host a giveaway on Instagram, you may also get "giveaway accounts" (people who only use the account to participate in IG giveaways) as participants. You can decide how to handle these. I prefer to support my fellow teachers when doing a giveaway, so I try to have one of the parameters as a comment regarding something teacher-related.
Can you schedule Instagram posts? Yes! Greg (my other half) recently wrote a blog post about the new Instagram scheduler Wisel.it here! (It's free, too!)
Best times to Post/Looking at Analytics As explained in this article, the best times to post are 2 a.m. and 5 p.m. EST. Although there isn't a huge difference in on the best day to post, Wednesday did show to be the best day.
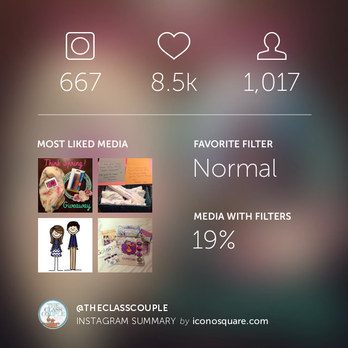
One way to look at some basic Instagram Analytics is through Iconosquare. Once logged in with your Instagram info, you can get information such as your most liked posts, the amount of likes/comments you've gotten, and your follower count. You can take a look at your most liked posts to see if there is anything in common with the time posted and the type of content posted. When Iconosquare updates, it sends you a snapshot of your Instagram stats! This is very helpful if you are tracking your stats!
Another way to find new people to follow is by pressing the speech bubble with a heart at the bottom, and then "following" at the top. Here you will get to see the pictures that people you already follow have liked. You may see some pictures that catch your eye, and then check out the person they belong to!
Finally, don't forget about the followers you already have! You may have some who show you lots of love in likes or comments. Be sure to check out their IG page too!
What about getting new followers? When it comes to getting new followers, I find that engagement is key. While liking photos is great, commenting on photos shows interest in others, which may in turn, entice others to start following you!
Flash Freebies & Giveaways Freebies and giveaways on Instagram are a great way to say thank you to your followers as well as celebrate different occasions, whether it be a blogiversary, a milestone, finishing a new product, etc. For a freebie, all you need to do is post an image about it, and place the link in your profile. When doing a giveaway, you need to decide if you are going to host it solely on IG, or advertise it there and host it on your blog or Facebook page. If hosting on Instagram, you set the parameters for the entries, whether it be for the participants to repost the image with a special hashtag, place a comment under the picture, etc. Speaking from experience, if you host a giveaway on Instagram, you may also get "giveaway accounts" (people who only use the account to participate in IG giveaways) as participants. You can decide how to handle these. I prefer to support my fellow teachers when doing a giveaway, so I try to have one of the parameters as a comment regarding something teacher-related.
Can you schedule Instagram posts? Yes! Greg (my other half) recently wrote a blog post about the new Instagram scheduler Wisel.it here! (It's free, too!)
Best times to Post/Looking at Analytics As explained in this article, the best times to post are 2 a.m. and 5 p.m. EST. Although there isn't a huge difference in on the best day to post, Wednesday did show to be the best day.
One way to look at some basic Instagram Analytics is through Iconosquare. Once logged in with your Instagram info, you can get information such as your most liked posts, the amount of likes/comments you've gotten, and your follower count. You can take a look at your most liked posts to see if there is anything in common with the time posted and the type of content posted. When Iconosquare updates, it sends you a snapshot of your Instagram stats! This is very helpful if you are tracking your stats!
While all of this Instagram information may be a bit overwhelming, the best way to start is to jump in and give it a try! Pick one app to start with, and try fancy-ing up a photo! The Instagram atmosphere is very fun and positive, which makes it an awesome place to connect with other teachers around the world! Be sure to continue to check back on the #tptSMsurge Facebook group to learn even more about Instagram throughout the week!